建设企业网站报价百度流量推广项目
本文讲述springboot使用mongodb,上传文件并使用应用程序作为媒介查看文件。
文章目录
- 1.构建springboot程序,需要依赖
- 2.配置mongo连接
- 3.创建项目结构以及对应的代码:
- 4.使用postman测试
1.构建springboot程序,需要依赖
(为了省事使用了lombok,几的给IDE装插件):
<dependency><groupId>org.springframework.boot</groupId><artifactId>spring-boot-starter-data-mongodb</artifactId></dependency><dependency><groupId>org.projectlombok</groupId><artifactId>lombok</artifactId><optional>true</optional></dependency><dependency><groupId>org.springframework.boot</groupId><artifactId>spring-boot-starter-test</artifactId><scope>test</scope></dependency><dependency><groupId>org.springframework.boot</groupId><artifactId>spring-boot-starter-web</artifactId><version>RELEASE</version><scope>compile</scope></dependency>
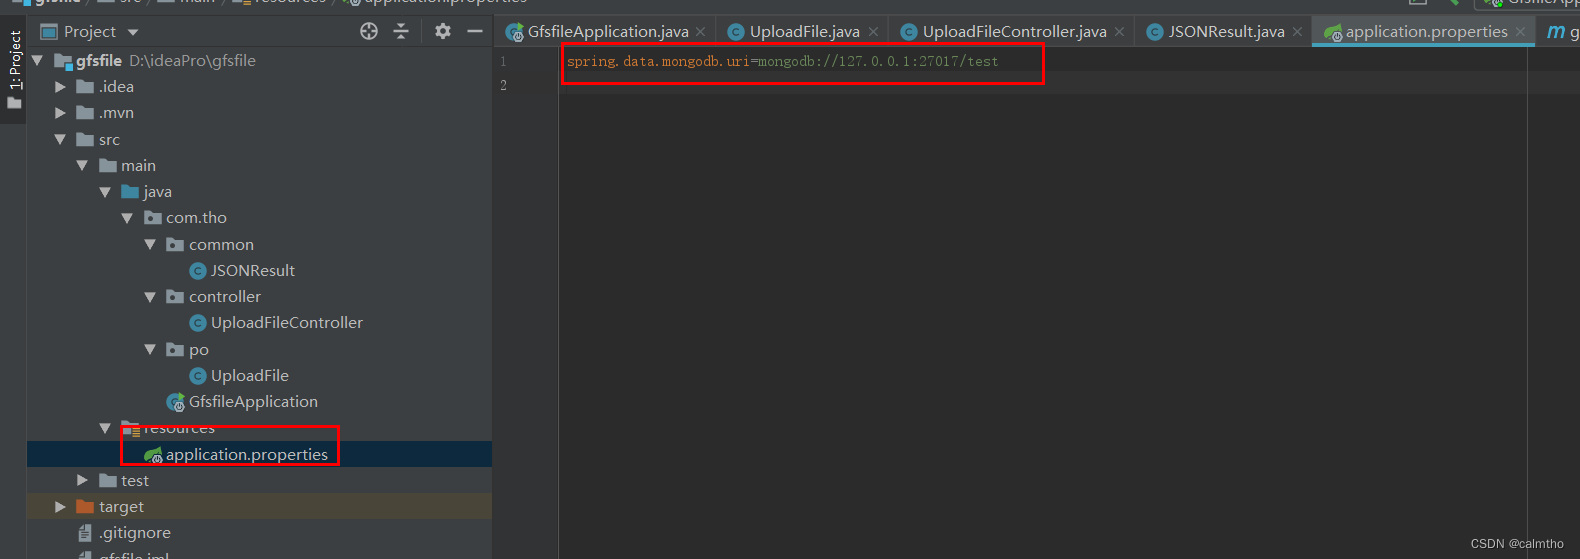
2.配置mongo连接
spring.data.mongodb.uri=mongodb://127.0.0.1:27017/test
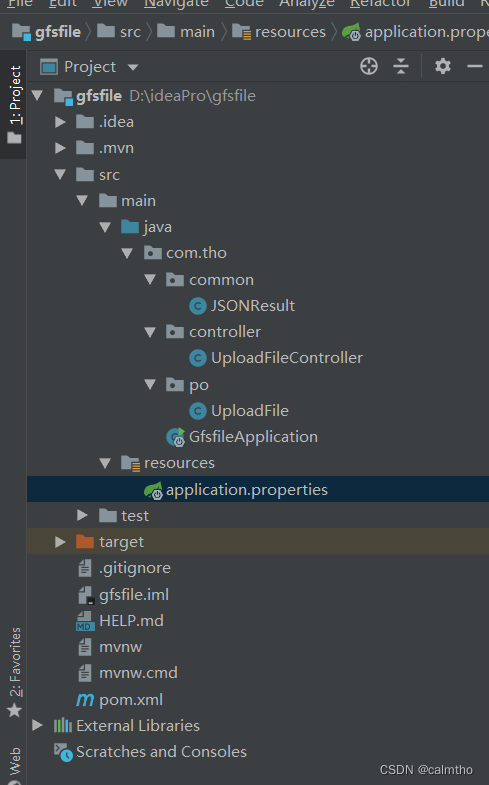
3.创建项目结构以及对应的代码:
构建统一结果响应类JSONResult
@Data
@Accessors(chain = true)
public class JSONResult<T> implements Serializable {/** 状态值 */private Integer code;/** 提示信息 */private String msg;/** 数据 */private T data;public static <T> JSONResult<T> build(int code, String msg, T data) {return new JSONResult<T>().setCode(code).setMsg(msg).setData(data);}}
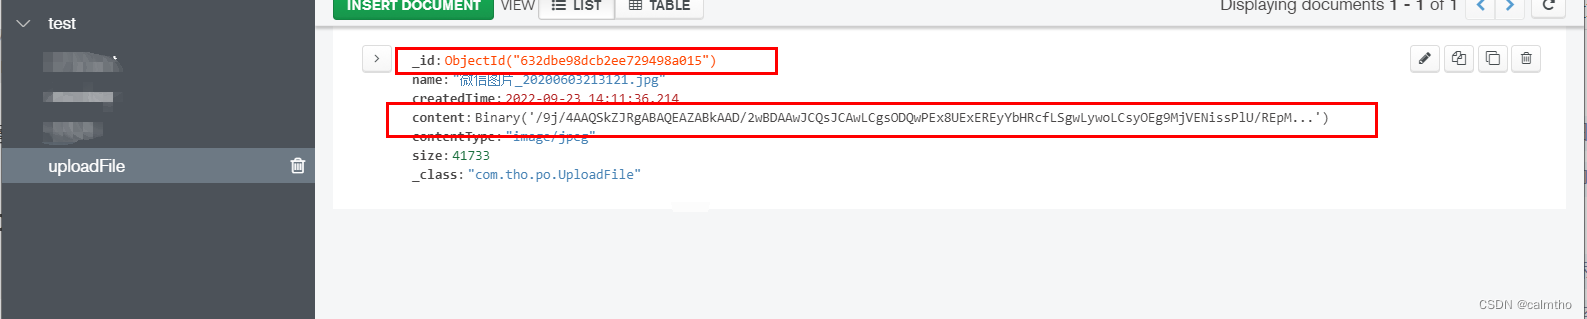
上传文件记录表
@Data
@Document
@Accessors(chain = true)
public class UploadFile {@Idprivate String id;/** 文件名 */private String name;/** 上传时间 */private LocalDateTime createdTime;/** 文件内容 */private Binary content;/** 文件类型 */private String contentType;/** 文件大小 */private long size;
}
上传控制器UploadFileController:
@Slf4j
@AllArgsConstructor
@RestController
@RequestMapping("/file")
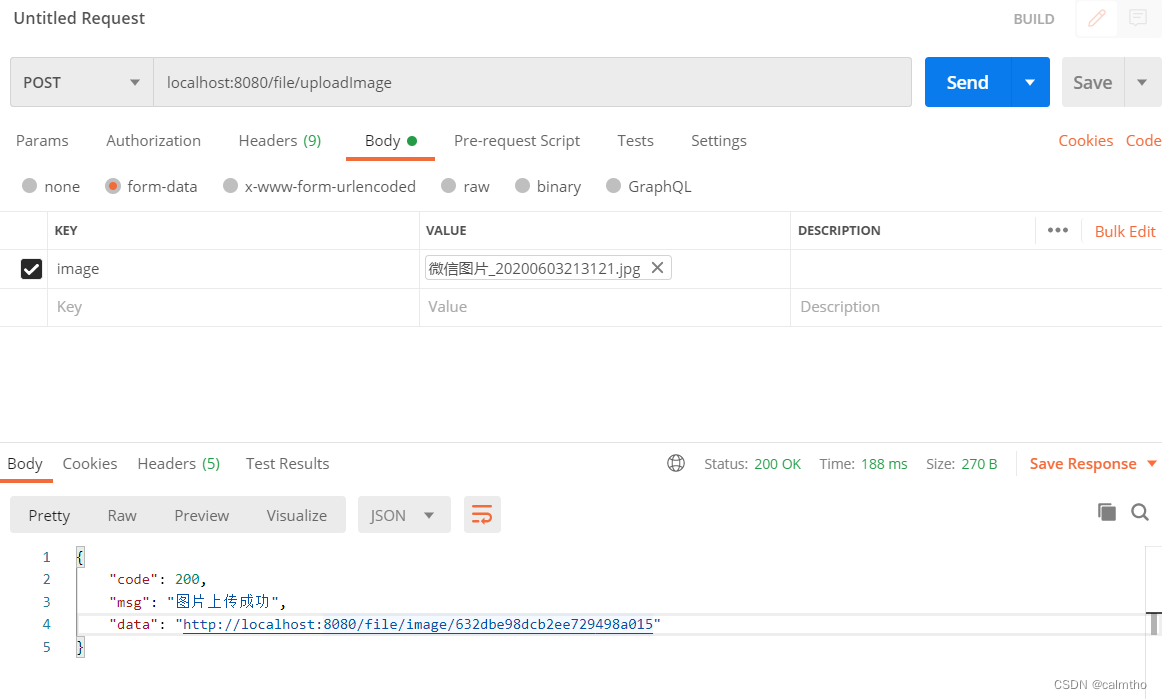
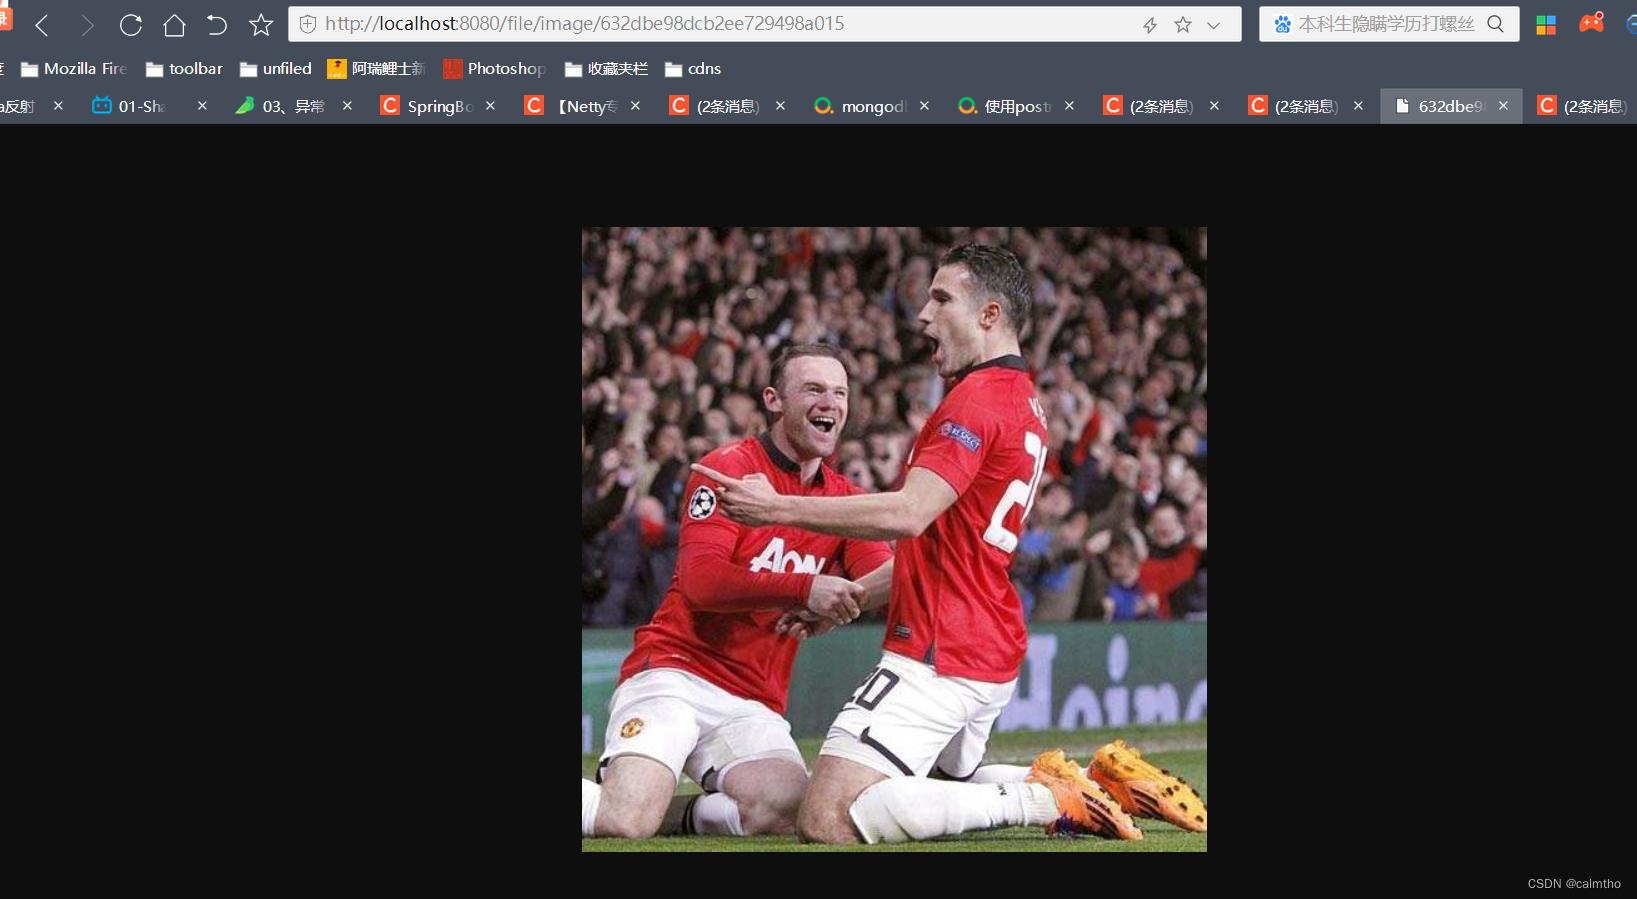
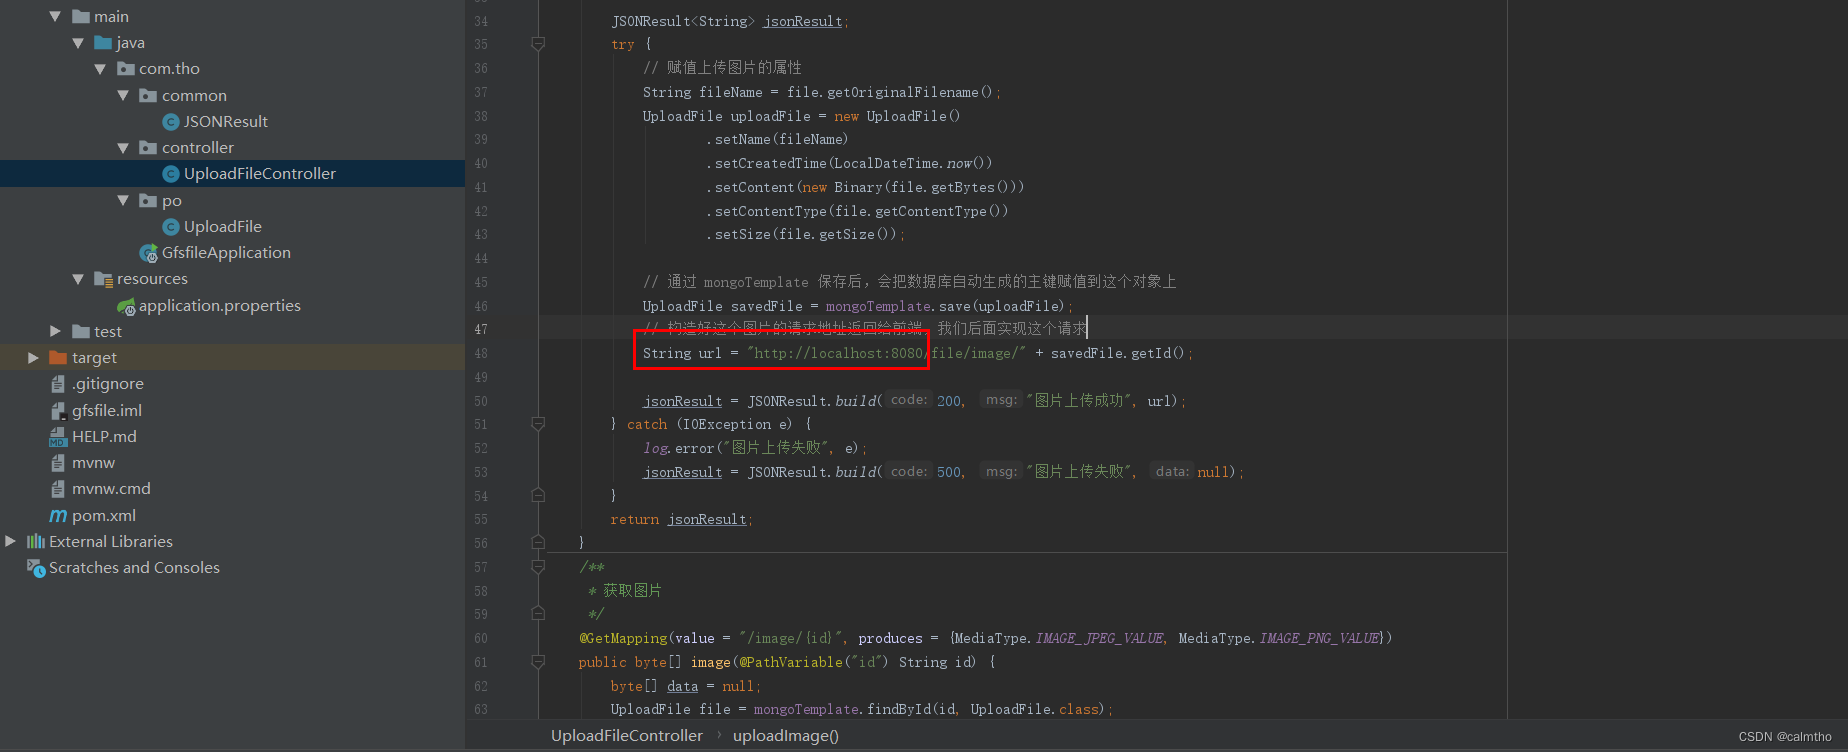
public class UploadFileController {private final MongoTemplate mongoTemplate;/*** 图片上传*/@PostMapping("/uploadImage")public JSONResult<String> uploadImage(@RequestParam(value = "image") MultipartFile file) {if (file.isEmpty())return JSONResult.build(400, "请选择一张图片", null);JSONResult<String> jsonResult;try {// 赋值上传图片的属性String fileName = file.getOriginalFilename();UploadFile uploadFile = new UploadFile().setName(fileName).setCreatedTime(LocalDateTime.now()).setContent(new Binary(file.getBytes())).setContentType(file.getContentType()).setSize(file.getSize());// 通过 mongoTemplate 保存后,会把数据库自动生成的主键赋值到这个对象上UploadFile savedFile = mongoTemplate.save(uploadFile);// 需构造好这个图片的请求地址返回给前端,我们后面实现这个请求String url = "http://localhost:8080/file/image/" + savedFile.getId();jsonResult = JSONResult.build(200, "图片上传成功", url);} catch (IOException e) {log.error("图片上传失败", e);jsonResult = JSONResult.build(500, "图片上传失败", null);}return jsonResult;}/*** 获取图片*/@GetMapping(value = "/image/{id}", produces = {MediaType.IMAGE_JPEG_VALUE, MediaType.IMAGE_PNG_VALUE})public byte[] image(@PathVariable("id") String id) {byte[] data = null;UploadFile file = mongoTemplate.findById(id, UploadFile.class);if (file != null) {data = file.getContent().getData();}return data;}
}
注意事项:值得注意由于是演示项目所以使用写死的路径
应该使用服务器的ip地址以及对应的server.servlet.context-path
4.使用postman测试