源码之前,了无秘密!
一、知其然
开发一个Nginx模块,将自己的HTTP模块编译进Nginx
三步走:
1.编写实际开发的xxx.c文件
2.编写的xxx.c文件目录下编写shell脚本的config文件,开发一个HTTP模块,config文件中必要的3个变量如下:
ngx_addon_name:模块名称,只在configure执行时使用
HTTP_MODULES:保存所有的HTTP模块名称,变量的赋值定义方式--->var = "var xxx_module" 例如 HTTP_MODULES="HTTP_MODULES ndg_test_module" 相当于把新的字符串加到变量末尾,类似于“+=”操作符
NDG_ADDON_SRCS:指定模块的源代码
3.编译命令 ./configure --add-module=$your_module_addr
代码来自《Nginx完全开发指南》---罗剑锋
NdgTestModule.cpp
配置的数据结构
struct NdgTestConf final
{  ngx_flag_t enabled = NgxUnsetValue::get();  //ngx_flag_t类型 将配置文件nginx.conf中的location中的on|off信息转换成1|0
};
配置的解析
static ngx_command_t ndg_test_cmds[] =                //配置指令数组
{{ngx_string("ndg_test"),              //指令的名字
NGX_HTTP_LOC_CONF|NGX_CONF_FLAG,         //指令的作用域和类型ngx_conf_set_flag_slot,              //解析函数指针NGX_HTTP_LOC_CONF_OFFSET,             //数据的存储位置
        offsetof(NdgTestConf, enabled),          nullptr},ngx_null_command                      //空对象,数组结束
};
创建配置数据
static void* create(ngx_conf_t* cf)
{return NgxPool(cf).alloc<NdgTestConf>();
}
处理函数
static ngx_int_t handler(ngx_http_request_t *r)
{auto cf = reinterpret_cast<NdgTestConf*>(ngx_http_get_module_loc_conf(r, ndg_test_module));NgxLogError(r).print("hello c++");if (cf->enabled){std::cout << "hello nginx" << std::endl;}else{std::cout << "hello disabled" << std::endl;}return NGX_DECLINED;
}
注册处理函数(init)
static ngx_int_t init(ngx_conf_t* cf)
{auto cmcf = reinterpret_cast<ngx_http_core_main_conf_t*>(ngx_http_conf_get_module_main_conf(cf, ngx_http_core_module));NgxArray<ngx_http_handler_pt> arr(cmcf->phases[NGX_HTTP_REWRITE_PHASE].handlers);arr.push(handler);return NGX_OK;
}
集成配置函数(ngx_http_module_t)
static ngx_http_module_t ndg_test_ctx =
{nullptr,init,nullptr,nullptr,nullptr,nullptr,create,nullptr,
};
集成配置指令(ngx_module_t)
ngx_module_t ndg_test_module =
{NGX_MODULE_V1,                 // 标准的填充宏&ndg_test_ctx,                 // 配置功能函数ndg_test_cmds,                 // 配置指令数组NGX_HTTP_MODULE,                // typenullptr,                                  // init masternullptr,                                  // init modulenullptr,                                  // init processnullptr,                                  // init threadnullptr,                                  // exit threadnullptr,                                  // exit processnullptr,                                  // exit master
    NGX_MODULE_V1_PADDING              // 标准的填充宏
};
config示例
ngx_addon_name=ndg_test_module
ngx_module_type=HTTP
ngx_module_name=ndg_test_module
ngx_module_srcs="$ngx_addon_dir/NdgTestModule.cpp"
HTTP_MODULES="$HTTP_MODULES ndg_test_module"
NGX_ADDON_SRCS="$NGX_ADDON_SRCS $ngx_addon_dir/NdgTestModule.cpp"
二、所以然
先认识几个模块的结构
typedef  struct ngx_module_s  ngx_module_t;
struct ngx_module_s {ngx_uint_t            ctx_index;                                  //type类模块数组里的序号(二级索引)ngx_uint_t            index;                       //所有模块数组里的序号(一级索引)char                 *name;                       //模块的名字ngx_uint_t            spare0;                      //保留字段ngx_uint_t            spare1;  ngx_uint_t            version;                      //模块版本,值为nginx_versionconst char           *signature;                     //模块签名,特征码void                 *ctx;                        //函数指针表ngx_command_t        *commands;                     //模块指令数组ngx_uint_t            type;                       //模块类型标记ngx_int_t           (*init_master)(ngx_log_t *log);          //进程、线程初始化和退出时的回调函数指针(7个)ngx_int_t           (*init_module)(ngx_cycle_t *cycle);ngx_int_t           (*init_process)(ngx_cycle_t *cycle);ngx_int_t           (*init_thread)(ngx_cycle_t *cycle);void                (*exit_thread)(ngx_cycle_t *cycle);void                (*exit_process)(ngx_cycle_t *cycle);void                (*exit_master)(ngx_cycle_t *cycle);uintptr_t             spare_hook0;                       //保留字段(8个)uintptr_t             spare_hook1;uintptr_t             spare_hook2;uintptr_t             spare_hook3;uintptr_t             spare_hook4;uintptr_t             spare_hook5;uintptr_t             spare_hook6;uintptr_t             spare_hook7;
};
Nginx中的填充宏使上述定义简化为
struct ngx_module_s {NGX_MODULE_V1,void                 *ctx;ngx_command_t        *commands;ngx_uint_t            type;NULL,...(共7个NULL),
   NGX_MODULE_V1_PADDING
};
ctx是函数指针表,类似C++虚继承里面的虚函数表,Nginx的6类模块定义了自己的ctx结构,命名为ngx_xxx_module_t
typedef struct {ngx_str_t             name;void               *(*create_conf)(ngx_cycle_t *cycle);char               *(*init_conf)(ngx_cycle_t *cycle, void *conf);
} ngx_core_module_t;
typedef struct {ngx_str_t             name;void               *(*create_conf)(ngx_cycle_t *cycle);char               *(*init_conf)(ngx_cycle_t *cycle, void *conf);
} ngx_core_module_t;
typedef struct {ngx_int_t   (*preconfiguration)(ngx_conf_t *cf);ngx_int_t   (*postconfiguration)(ngx_conf_t *cf);void       *(*create_main_conf)(ngx_conf_t *cf);char       *(*init_main_conf)(ngx_conf_t *cf, void *conf);void       *(*create_srv_conf)(ngx_conf_t *cf);char       *(*merge_srv_conf)(ngx_conf_t *cf, void *prev, void *conf);void       *(*create_loc_conf)(ngx_conf_t *cf);char       *(*merge_loc_conf)(ngx_conf_t *cf, void *prev, void *conf);
} ngx_http_module_t;
typedef struct {void        **main_conf;void        **srv_conf;void        **loc_conf;
} ngx_http_conf_ctx_t;
typedef struct ngx_command_s     ngx_command_t;
struct ngx_command_s {ngx_str_t             name;                              //指令的名字ngx_uint_t            type;                              //指令的作用域和类型char               *(*set)(ngx_conf_t *cf, ngx_command_t *cmd, void *conf); //指令解析函数ngx_uint_t            conf;                              //配置结构所在的存储位置ngx_uint_t            offset;                             //具体的存储变量的偏移量void                 *post;
};
上面单独把一些结构拎出来,接下来以ngx_core_module为引粗浅介绍模块的配置解析
ngx_module_t定义了很多Nginx框架在加载模块时所必需的信息,可以在编译生成的objs/ngx_modules.c文件种看到所加载的模块信息
部分截图如下:
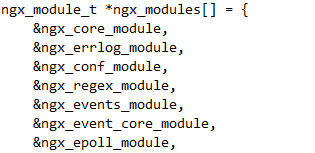
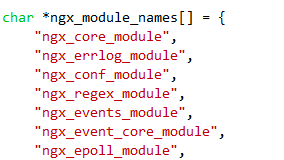
后面会对应模块的名字:
在nginx.c文件(main函数也在nginx.c)中
ngx_module_t  ngx_core_module = {NGX_MODULE_V1,&ngx_core_module_ctx,                  /* module context */ngx_core_commands,                     /* module directives */NGX_CORE_MODULE,                       /* module type */NULL,                                  /* init master */NULL,                                  /* init module */NULL,                                  /* init process */NULL,                                  /* init thread */NULL,                                  /* exit thread */NULL,                                  /* exit process */NULL,                                  /* exit master */NGX_MODULE_V1_PADDING
};
对着上文提到的ngx_module_t的结构来看会比较清晰,NGX_MODULE_V1和NGX_MODULE_V1_PADDING是标准版填充宏。初始化ngx_core_module时调用ngx_core_module_ctx(void* 函数指针有点c++中的泛型和虚函数表的意思),接着调用ngx_core_commands指令数组,NGX_CORE_MODULE是类型标记的type。
Nginx的6类模块(core,conf,event,stream,http,mail)定义了自己ctx结构(函数指针表),命令规范为ngx_xxx_module_t
static ngx_core_module_t  ngx_core_module_ctx = {ngx_string("core"),                              //模块名字ngx_core_module_create_conf,ngx_core_module_init_conf
};
类比于第一部分中的ngx_http_module_t结构,模块的ctx函数指针表,接下来看core模块的create分配内存创建配置数据结构
static void *
ngx_core_module_create_conf(ngx_cycle_t *cycle)
{ngx_core_conf_t  *ccf;                          //配置结构的数据指针ccf = ngx_pcalloc(cycle->pool, sizeof(ngx_core_conf_t));      //创建配置数据结构if (ccf == NULL) {return NULL;}/** set by ngx_pcalloc()**     ccf->pid = NULL;*     ccf->oldpid = NULL;*     ccf->priority = 0;*     ccf->cpu_affinity_auto = 0;*     ccf->cpu_affinity_n = 0;*     ccf->cpu_affinity = NULL;*/ccf->daemon = NGX_CONF_UNSET;                     //值都置为UNSETccf->master = NGX_CONF_UNSET;ccf->timer_resolution = NGX_CONF_UNSET_MSEC;ccf->shutdown_timeout = NGX_CONF_UNSET_MSEC;ccf->worker_processes = NGX_CONF_UNSET;ccf->debug_points = NGX_CONF_UNSET;ccf->rlimit_nofile = NGX_CONF_UNSET;ccf->rlimit_core = NGX_CONF_UNSET;ccf->user = (ngx_uid_t) NGX_CONF_UNSET_UINT;ccf->group = (ngx_gid_t) NGX_CONF_UNSET_UINT;if (ngx_array_init(&ccf->env, cycle->pool, 1, sizeof(ngx_str_t))!= NGX_OK){return NULL;}return ccf;
}
以上这一步类比于第一部分的create函数。
ngx_core_conf_t是core模块需要配置的数据结构,保存了Nginx运行所需的基本参数,结构如下:
typedef struct {ngx_flag_t                daemon;          //守护进程标志位ngx_flag_t                master;          //master进程标志位ngx_msec_t                timer_resolution;ngx_msec_t                shutdown_timeout;ngx_int_t                 worker_processes;ngx_int_t                 debug_points;ngx_int_t                 rlimit_nofile;off_t                     rlimit_core;int                       priority;ngx_uint_t                cpu_affinity_auto;ngx_uint_t                cpu_affinity_n;ngx_cpuset_t             *cpu_affinity;char                     *username;ngx_uid_t                 user;ngx_gid_t                 group;ngx_str_t                 working_directory;ngx_str_t                 lock_file;ngx_str_t                 pid;ngx_str_t                 oldpid;ngx_array_t               env;char                    **environment;ngx_uint_t                transparent;  /* unsigned  transparent:1; */
} ngx_core_conf_t;
创建好了ngx_core_conf_t数据结构,接下来是ngx_core_module_init_conf函数初始化配置结构
static char *
ngx_core_module_init_conf(ngx_cycle_t *cycle, void *conf)
{ngx_core_conf_t  *ccf = conf;ngx_conf_init_value(ccf->daemon, 1);            //默认启用守护进程,#define ngx_conf_init_value Nginx以宏的形式提供初始化和条件赋值ngx_conf_init_value(ccf->master, 1);ngx_conf_init_msec_value(ccf->timer_resolution, 0);ngx_conf_init_msec_value(ccf->shutdown_timeout, 0);ngx_conf_init_value(ccf->worker_processes, 1);ngx_conf_init_value(ccf->debug_points, 0);#if (NGX_HAVE_CPU_AFFINITY)if (!ccf->cpu_affinity_auto&& ccf->cpu_affinity_n&& ccf->cpu_affinity_n != 1&& ccf->cpu_affinity_n != (ngx_uint_t) ccf->worker_processes){ngx_log_error(NGX_LOG_WARN, cycle->log, 0,"the number of \"worker_processes\" is not equal to ""the number of \"worker_cpu_affinity\" masks, ""using last mask for remaining worker processes");}#endifif (ccf->pid.len == 0) {ngx_str_set(&ccf->pid, NGX_PID_PATH);}if (ngx_conf_full_name(cycle, &ccf->pid, 0) != NGX_OK) {return NGX_CONF_ERROR;}ccf->oldpid.len = ccf->pid.len + sizeof(NGX_OLDPID_EXT);ccf->oldpid.data = ngx_pnalloc(cycle->pool, ccf->oldpid.len);if (ccf->oldpid.data == NULL) {return NGX_CONF_ERROR;}ngx_memcpy(ngx_cpymem(ccf->oldpid.data, ccf->pid.data, ccf->pid.len),NGX_OLDPID_EXT, sizeof(NGX_OLDPID_EXT));#if !(NGX_WIN32)if (ccf->user == (uid_t) NGX_CONF_UNSET_UINT && geteuid() == 0) {struct group   *grp;struct passwd  *pwd;ngx_set_errno(0);pwd = getpwnam(NGX_USER);if (pwd == NULL) {ngx_log_error(NGX_LOG_EMERG, cycle->log, ngx_errno,"getpwnam(\"" NGX_USER "\") failed");return NGX_CONF_ERROR;}ccf->username = NGX_USER;ccf->user = pwd->pw_uid;ngx_set_errno(0);grp = getgrnam(NGX_GROUP);if (grp == NULL) {ngx_log_error(NGX_LOG_EMERG, cycle->log, ngx_errno,"getgrnam(\"" NGX_GROUP "\") failed");return NGX_CONF_ERROR;}ccf->group = grp->gr_gid;}if (ccf->lock_file.len == 0) {ngx_str_set(&ccf->lock_file, NGX_LOCK_PATH);}if (ngx_conf_full_name(cycle, &ccf->lock_file, 0) != NGX_OK) {return NGX_CONF_ERROR;}{ngx_str_t  lock_file;lock_file = cycle->old_cycle->lock_file;if (lock_file.len) {lock_file.len--;if (ccf->lock_file.len != lock_file.len|| ngx_strncmp(ccf->lock_file.data, lock_file.data, lock_file.len)!= 0){ngx_log_error(NGX_LOG_EMERG, cycle->log, 0,"\"lock_file\" could not be changed, ignored");}cycle->lock_file.len = lock_file.len + 1;lock_file.len += sizeof(".accept");cycle->lock_file.data = ngx_pstrdup(cycle->pool, &lock_file);if (cycle->lock_file.data == NULL) {return NGX_CONF_ERROR;}} else {cycle->lock_file.len = ccf->lock_file.len + 1;cycle->lock_file.data = ngx_pnalloc(cycle->pool,ccf->lock_file.len + sizeof(".accept"));if (cycle->lock_file.data == NULL) {return NGX_CONF_ERROR;}ngx_memcpy(ngx_cpymem(cycle->lock_file.data, ccf->lock_file.data,ccf->lock_file.len),".accept", sizeof(".accept"));}}#endifreturn NGX_CONF_OK;
}
接下来继续回到ngx_module_t ngx_core_module = {}; 中调用ngx_core_commands指令数组,以ngx_null_command结束数组
static ngx_command_t  ngx_core_commands[] = {{ ngx_string("daemon"),NGX_MAIN_CONF|NGX_DIRECT_CONF|NGX_CONF_FLAG,ngx_conf_set_flag_slot,0,offsetof(ngx_core_conf_t, daemon),NULL },{ ngx_string("master_process"),NGX_MAIN_CONF|NGX_DIRECT_CONF|NGX_CONF_FLAG,ngx_conf_set_flag_slot,0,offsetof(ngx_core_conf_t, master),NULL },{ ngx_string("timer_resolution"),NGX_MAIN_CONF|NGX_DIRECT_CONF|NGX_CONF_TAKE1,ngx_conf_set_msec_slot,0,offsetof(ngx_core_conf_t, timer_resolution),NULL },{ ngx_string("pid"),NGX_MAIN_CONF|NGX_DIRECT_CONF|NGX_CONF_TAKE1,ngx_conf_set_str_slot,0,offsetof(ngx_core_conf_t, pid),NULL },{ ngx_string("lock_file"),NGX_MAIN_CONF|NGX_DIRECT_CONF|NGX_CONF_TAKE1,ngx_conf_set_str_slot,0,offsetof(ngx_core_conf_t, lock_file),NULL },{ ngx_string("worker_processes"),NGX_MAIN_CONF|NGX_DIRECT_CONF|NGX_CONF_TAKE1,ngx_set_worker_processes,0,0,NULL },{ ngx_string("debug_points"),NGX_MAIN_CONF|NGX_DIRECT_CONF|NGX_CONF_TAKE1,ngx_conf_set_enum_slot,0,offsetof(ngx_core_conf_t, debug_points),&ngx_debug_points },{ ngx_string("user"),NGX_MAIN_CONF|NGX_DIRECT_CONF|NGX_CONF_TAKE12,ngx_set_user,0,0,NULL },{ ngx_string("worker_priority"),NGX_MAIN_CONF|NGX_DIRECT_CONF|NGX_CONF_TAKE1,ngx_set_priority,0,0,NULL },{ ngx_string("worker_cpu_affinity"),NGX_MAIN_CONF|NGX_DIRECT_CONF|NGX_CONF_1MORE,ngx_set_cpu_affinity,0,0,NULL },{ ngx_string("worker_rlimit_nofile"),NGX_MAIN_CONF|NGX_DIRECT_CONF|NGX_CONF_TAKE1,ngx_conf_set_num_slot,0,offsetof(ngx_core_conf_t, rlimit_nofile),NULL },{ ngx_string("worker_rlimit_core"),NGX_MAIN_CONF|NGX_DIRECT_CONF|NGX_CONF_TAKE1,ngx_conf_set_off_slot,0,offsetof(ngx_core_conf_t, rlimit_core),NULL },{ ngx_string("worker_shutdown_timeout"),NGX_MAIN_CONF|NGX_DIRECT_CONF|NGX_CONF_TAKE1,ngx_conf_set_msec_slot,0,offsetof(ngx_core_conf_t, shutdown_timeout),NULL },{ ngx_string("working_directory"),NGX_MAIN_CONF|NGX_DIRECT_CONF|NGX_CONF_TAKE1,ngx_conf_set_str_slot,0,offsetof(ngx_core_conf_t, working_directory),NULL },{ ngx_string("env"),NGX_MAIN_CONF|NGX_DIRECT_CONF|NGX_CONF_TAKE1,ngx_set_env,0,0,NULL },{ ngx_string("load_module"),NGX_MAIN_CONF|NGX_DIRECT_CONF|NGX_CONF_TAKE1,ngx_load_module,0,0,NULL },ngx_null_command
};
在ngx_core_command[]中,每一个数组元素结构体中有指令的名字,指令的作用域。例如NGX_HTTP_MAIN_CONF表示指令可以出现在配置文件(nginx.conf)的http块里面,NGX_HTTP_LOC_CONF表示可以出现在location块里面。NGX_MAIN_CONF|NGX_DIRECT_CONF表示只能出现在配置文件最外层的main域,不是http main域。根据ngx_command_s结构体里面的conf和offset在配置的数据结构ngx_core_conf_t里找到变量位置,通过ngx_conf_set_flag_slot之类的解析函数来进行指令的解析。以ngx_conf_set_flag_slot为例将 on|off 解析成数字 1|0
char *
ngx_conf_set_flag_slot(ngx_conf_t *cf, ngx_command_t *cmd, void *conf)
{char  *p = conf;ngx_str_t        *value;ngx_flag_t       *fp;ngx_conf_post_t  *post;fp = (ngx_flag_t *) (p + cmd->offset);if (*fp != NGX_CONF_UNSET) {return "is duplicate";}value = cf->args->elts;if (ngx_strcasecmp(value[1].data, (u_char *) "on") == 0) {*fp = 1;} else if (ngx_strcasecmp(value[1].data, (u_char *) "off") == 0) {*fp = 0;} else {ngx_conf_log_error(NGX_LOG_EMERG, cf, 0,"invalid value \"%s\" in \"%s\" directive, ""it must be \"on\" or \"off\"",value[1].data, cmd->name.data);return NGX_CONF_ERROR;}if (cmd->post) {post = cmd->post;return post->post_handler(cf, post, fp);}return NGX_CONF_OK;
}
ngx_core_module本身没有业务逻辑,只是提供了Nginx运行所需的基本参数,由Nginx框架在运行时直接获取和使用。
启动Nginx时,nginx.c文件中的main函数调用ngx_get_conf来从conf_ctx数组里获取配置结构,对于core模块来说就是ngx_core_conf_t
ccf = (ngx_core_conf_t *) ngx_get_conf(cycle->conf_ctx, ngx_core_module);
conf_ctx定义在ngx_cycle_s中 ( typedef struct ngx_cycle_s ngx_cycle_t)
struct ngx_cycle_s {void                  ****conf_ctx;    //配置数据的起始存储位置ngx_pool_t               *pool;ngx_log_t                *log;ngx_log_t                 new_log;ngx_uint_t                log_use_stderr;  /* unsigned  log_use_stderr:1; */ngx_connection_t        **files;ngx_connection_t         *free_connections;ngx_uint_t                free_connection_n;ngx_module_t            **modules;ngx_uint_t                modules_n;ngx_uint_t                modules_used;    /* unsigned  modules_used:1; */ngx_queue_t               reusable_connections_queue;ngx_uint_t                reusable_connections_n;ngx_array_t               listening;ngx_array_t               paths;ngx_array_t               config_dump;ngx_rbtree_t              config_dump_rbtree;ngx_rbtree_node_t         config_dump_sentinel;ngx_list_t                open_files;ngx_list_t                shared_memory;ngx_uint_t                connection_n;ngx_uint_t                files_n;ngx_connection_t         *connections;ngx_event_t              *read_events;ngx_event_t              *write_events;ngx_cycle_t              *old_cycle;ngx_str_t                 conf_file;ngx_str_t                 conf_param;ngx_str_t                 conf_prefix;ngx_str_t                 prefix;ngx_str_t                 lock_file;ngx_str_t                 hostname;
};
ngx_get_conf是个函数宏
#define ngx_get_conf(conf_ctx, module) conf_ctx[module.index] 从conf_ctx配置结构数组里获取当前配置的位置,索引是module.index,也就是ngx_module_t结构里的index成员,index标记了模块在modules数组里的索引位置。objs/ngx_modules.c中可以查看这些modules
三、初识结语
反复的层级递归才粗略的摸清其中的结构,革命尚未成功,仍需继续!
参考资料
《Nginx完全开发指南 使用C、C++和OpenResty》---罗剑锋
《深入理解Nginx 模块开发与架构解析 第二版》---陶辉