网站建设实训教程/互联网项目推广
文章目录
- ListView
- 效果展示
- 布局
- 适配器(Adapter)
- 参考
ListView
效果展示
就是这么一个效果,以列表形式展示图片文字和网址,当点击列表时,主标题会展示对应的网址。
布局
可以将ListView看成一个容器,里面的每个元素都需要一个新的布局。
主界面放个ListView即可
<ListViewandroid:id="@+id/lv"android:layout_width="match_parent"android:layout_height="match_parent" />
然后我们需要给里面的元素也创建一个布局文件,这里面的布局就和我们先前展示的结果是一致的。
取名为listitem.xml:
<?xml version="1.0" encoding="utf-8"?>
<LinearLayout xmlns:android="http://schemas.android.com/apk/res/android"android:orientation="vertical"android:layout_width="match_parent"android:layout_height="match_parent"><LinearLayoutandroid:id="@+id/l1"android:layout_width="wrap_content"android:layout_height="wrap_content"><ImageViewandroid:id="@+id/img"android:layout_width="50dp"android:layout_height="50dp"android:src="@drawable/tb_baidu"/><LinearLayoutandroid:layout_width="wrap_content"android:layout_height="wrap_content"android:orientation="vertical"android:id="@+id/l2"><TextViewandroid:id="@+id/title"android:layout_width="wrap_content"android:layout_height="wrap_content"android:text="百度"android:textSize="20sp"/><TextViewandroid:id="@+id/info"android:layout_width="wrap_content"android:layout_height="wrap_content"android:text="http://www.baidu.com"android:textSize="20sp"/></LinearLayout></LinearLayout></LinearLayout>
可以看一下效果:
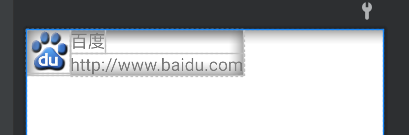
这就是一个listitem的布局(填充了图片和文字,可以修改成自己的图片和文字)
这样ListView的布局就完成了,相当于壳已经搭好了,现在需要实现内部的支撑了。
适配器(Adapter)
简单来说适配器就是为了绑定视图和数据吧。
SimpleAdapter(context, data, resource, from, to);
context:上下文(一般this即可)data:需要展示的数据源,是map组成的list集合,每个Map对应ListView中的一行,每一个Map(键——值对)中的键名必须包含在from中所指定的键;resource:展示的布局文件,可以自己在layout设置xml文件去设置需要展示 的样式;from:Map中的键名;to:绑定数据视图的ID,与from成对应的关系。
接下来配置一下我们需要的适配器。
首先需要先找到我们我们的ListView:
SimpleAdapter adapter = new SimpleAdapter(this,getData(),R.layout.listitem,new String[]{"img", "title", "info"},new int[]{R.id.img, R.id.title, R.id.info});
其中getData()是一个返回map类型的list数组数据的方法。
R.layout.listitem是我们定义的列表元素的布局。
new String[]{“img”, “title”, “info”}是我们定义getData()返回数据的map里的键。
new int[]{R.id.img, R.id.title, R.id.info}则是listitem里的视图id,同时与from成对应关系。
此时我们写一个getData()来返回我们需要的数据:
private List<Map<String,Object>> getData() {ArrayList<Map<String, Object>> listItem = new ArrayList<Map<String, Object>>();Map<String, Object> map = new HashMap<String, Object>();map.put("img", R.drawable.tb_baidu);map.put("title", "百度");map.put("info", "baidu.com");listItem.add(map);map = new HashMap<String, Object>();map.put("img", R.drawable.tb_netease);map.put("title", "网易");map.put("info", "www.163.com");listItem.add(map);map = new HashMap<String, Object>();map.put("img", R.drawable.tb_sina);map.put("title", "新浪");map.put("info", "www.sina.com");listItem.add(map);map = new HashMap<String, Object>();map.put("img", R.drawable.tb_tencent);map.put("title", "腾讯");map.put("info", "www.tencent.com");listItem.add(map);return listItem;
}
上课老师就这么演示的,简单粗暴,毕竟数据量少,就这样吧。
此时我们的Adapter就定义完成了。
接下来绑定到ListView上就行了。
那么首先我们需要先找到ListView:
ListView listView = findViewById(R.id.lv);
然后添加适配器:
listView.setAdapter(adapter);
这样就能出现我们需要的视图的结果了。
但是还需要点击响应事件,最后我们就设置一下响应事件就行:
listView.setOnItemClickListener(new AdapterView.OnItemClickListener() {@Overridepublic void onItemClick(AdapterView<?> parent, View view, int position, long id) {Map<String, Object> map = (Map<String, Object>)parent.getItemAtPosition(position);setTitle(map.get("title").toString() + "的网址为:"+ map.get("info").toString());}
});
至此,效果就达成了。
完整代码:Android移动应用开发之ListView的简单使用2
参考
老师上课讲的案例
SimpleAdapter用法