沈阳三好街网站建设/如何联系百度人工客服

点击上方蓝字关注我们
微信公众号:OpenCV学堂
关注获取更多计算机视觉与深度学习知识
大家好,前面一篇文章介绍了torchvision的模型ResNet50实现图像分类,这里再给大家介绍一下如何使用torchvision自带的对象检测模型Faster-RCNN实现对象检测。Torchvision自带的对象检测模型是基于COCO数据集训练的,最小分辨率支持800, 最大支持1333的输入图像。
Faster-RCNN模型
Faster-RCNN模型的基础网络是ResNet50, ROI生成使用了RPN,加上头部组成。图示如下:

在torchvision框架下可以通过下面的代码直接下载预训练模型,
model = torchvision.models.detection.fasterrcnn_resnet50_fpn(pretrained=True)model.eval()对模型使用GPU加速支持
# 使用GPU
train_on_gpu = torch.cuda.is_available()if train_on_gpu: model.cuda()推理输出有三个信息分别为:
boxes:表示对象框scores:表示每个对象得分labels:表示对于的分类标签图像检测
使用模型实现图像检测,支持90个类别的对象检测,代码实现如下:
def faster_rcnn_image_detection():
image = cv.imread("D:/images/cars.jpg")
blob = transform(image)
c, h, w = blob.shape
input_x = blob.view(1, c, h, w)
output = model(input_x.cuda())[0]
boxes = output['boxes'].cpu().detach().numpy()
scores = output['scores'].cpu().detach().numpy()
labels = output['labels'].cpu().detach().numpy()
index = 0
for x1, y1, x2, y2 in boxes:
if scores[index] > 0.5:
print(x1, y1, x2, y2)
cv.rectangle(image, (np.int32(x1), np.int32(y1)),
(np.int32(x2), np.int32(y2)), (0, 255, 255), 1, 8, 0)
label_id = labels[index]
label_txt = coco_names[str(label_id)]
cv.putText(image, label_txt, (np.int32(x1), np.int32(y1)), cv.FONT_HERSHEY_PLAIN, 1.0, (0, 0, 255), 1)
index += 1
cv.imshow("Faster-RCNN Detection Demo", image)
cv.waitKey(0)
cv.destroyAllWindows()
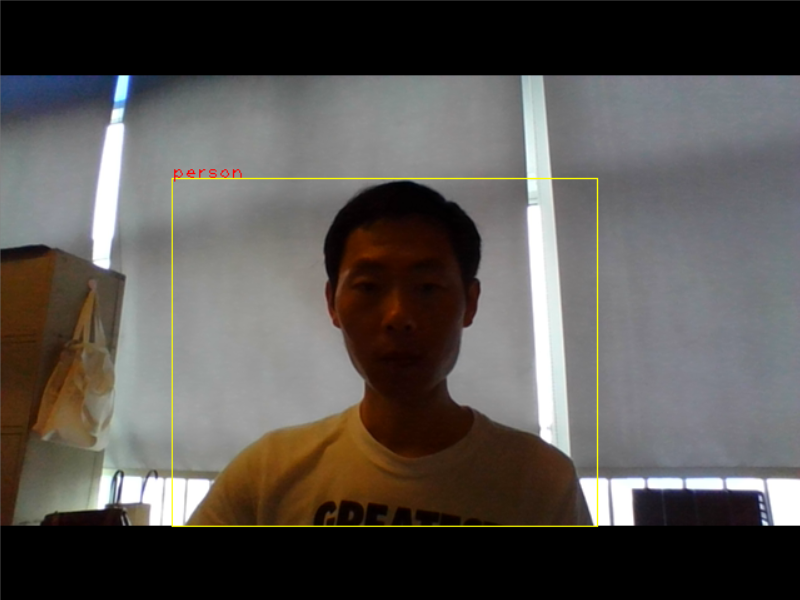
运行结果下:
视频实时对象检测
基于OpenCV实现视频文件或者摄像头读取,完成视频的实时对象检测,代码实现如下:
1capture = cv.VideoCapture("D:/images/video/vehicle.ts")
2while True:
3 ret, frame = capture.read()
4 if ret is not True:
5 break
6 blob = transform(frame)
7 c, h, w = blob.shape
8 input_x = blob.view(1, c, h, w)
9 output = model(input_x.cuda())[0]
10 boxes = output['boxes'].cpu().detach().numpy()
11 scores = output['scores'].cpu().detach().numpy()
12 labels = output['labels'].cpu().detach().numpy()
13 index = 0
14 for x1, y1, x2, y2 in boxes:
15 if scores[index] > 0.5:
16 cv.rectangle(frame, (np.int32(x1), np.int32(y1)),
17 (np.int32(x2), np.int32(y2)), (0, 255, 255), 1, 8, 0)
18 label_id = labels[index]
19 label_txt = coco_names[str(label_id)]
20 cv.putText(frame, label_txt, (np.int32(x1), np.int32(y1)), cv.FONT_HERSHEY_PLAIN, 1.0, (0, 0, 255), 1)
21 index += 1
22 wk = cv.waitKey(1)
23 if wk == 27:
24 break
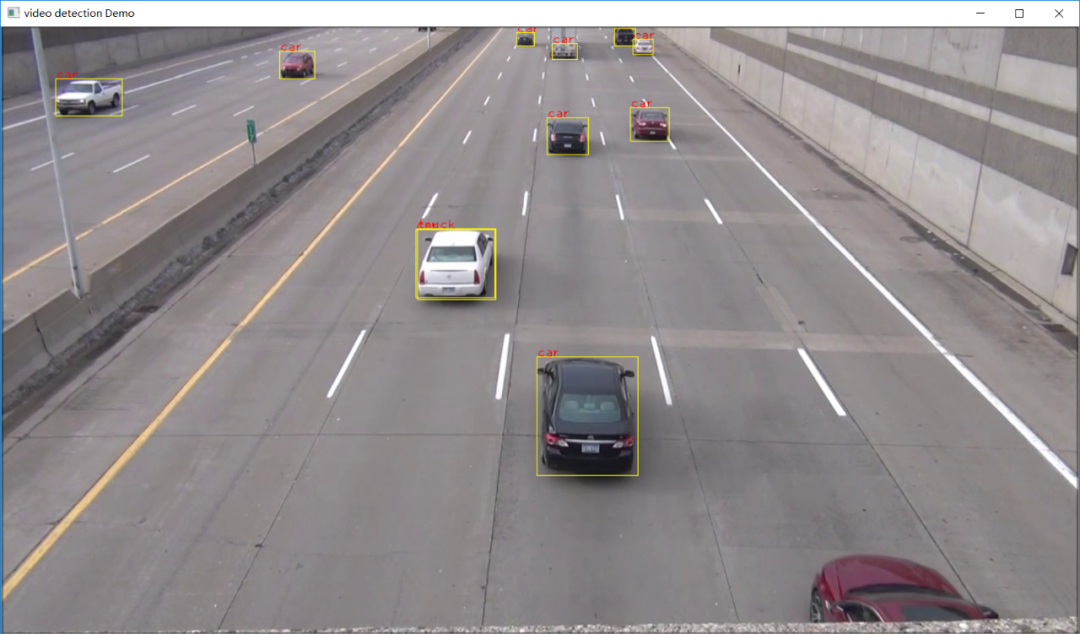
25 cv.imshow("video detection Demo", frame)运行结果如下:
推荐阅读
轻松学Pytorch–环境搭建与基本语法
Pytorch轻松学-构建浅层神经网络
轻松学pytorch-构建卷积神经网络
轻松学Pytorch –构建循环神经网络
轻松学Pytorch-使用卷积神经网络实现图像分类
轻松学Pytorch-自定义数据集制作与使用
轻松学Pytorch-Pytorch可视化
轻松学Pytorch–Visdom可视化
轻松学Pytorch – 全局池化层详解
轻松学Pytorch – 人脸五点landmark提取网络训练与使用
轻松学Pytorch – 年龄与性别预测
轻松学Pytorch –车辆类型与颜色识别
轻松学Pytorch-全卷积神经网络实现表情识别
使用OpenVINO加速Pytorch表情识别模型
轻松学pytorch – 使用多标签损失函数训练卷积网络
轻松学Pytorch-使用ResNet50实现图像分类
志不强者智不达
言不信者行不果