建一个个人网站多少钱/seo软文是什么
文章目录
- 本节目标
- `Thread`类
- 了解并发编程
- 多线程优势
- 创建`Thread`实例
- Thread下的一些重要方法
- java线程状态描述
本节目标
-
学习
java多线程编程! -
了解
java中的Thread类的基本使用! -
掌握
Thread创建线程对象的5种方法 -
学习
Thread类中的一些常用属性和方法!Thread类我们知道操作系统中的线程是并发执行的!
而Thread类是java给我们提供的一个类,通过Thread可以实现java并发编程!Thread类可以视为java标准库提供的API
创建好的Thread实例和操作系统的线程一一对应!!!Thread是在java.lang包下的类无需导入!!!了解并发编程
public class Thread_4 {public static void main(String[] args) {//自己创建的线程t1Thread t1 = new Thread(()->{while (true){System.out.println("hello Thread!");try {Thread.sleep(1000);} catch (InterruptedException e) {e.printStackTrace();}}});t1.start();//执行t1while (true){//主线程 main线程 一个java进程中自动创建了main线程!!!System.out.println("hello main");try {Thread.sleep(1000); //睡眠1s 阻塞线程!在这1s不然上cpu}catch (InterruptedException e){e.printStackTrace();}}}
}
``
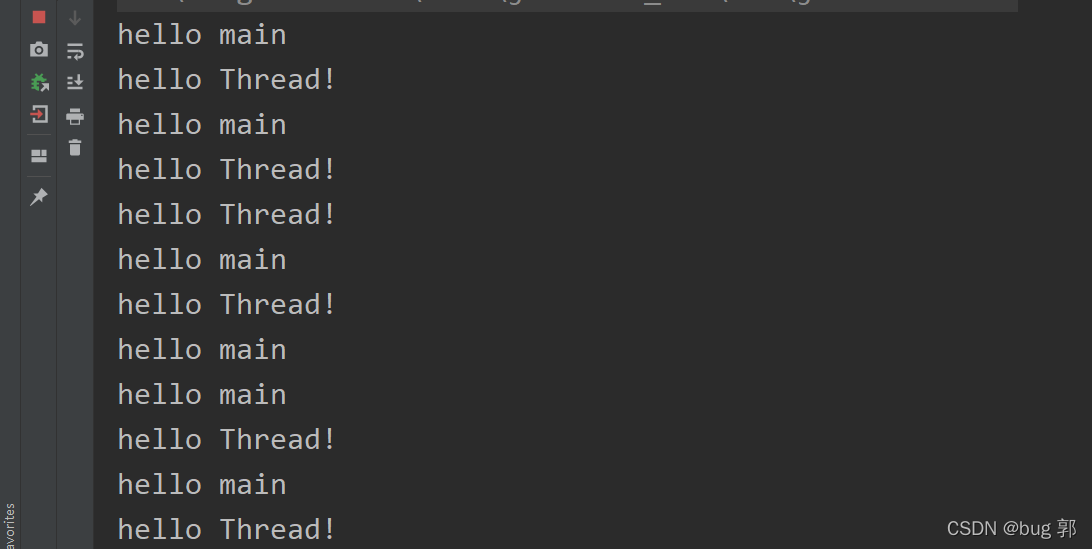
我们可以看到t1线程和main并发执行!这里的并发包括并发和并行!
我们也不知道cup啥时候让这两个线程并发,啥时候并行!
这些都是操作系统的调度问题!!!
多线程优势
当我们要同时自增两数时,采用多线程编程和单线程编程又有啥区别呢,让我们看看下方代码就知道了!
//自增两数
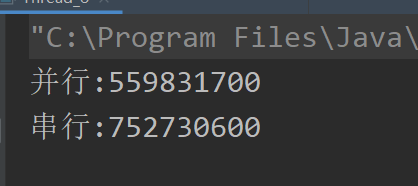
public class Thread_8 {private static final long count=100_0000_0000L;public static void main(String[] args) throws InterruptedException{concurrent();//多线程并行执行serial(); //单线程串行执行}public static void concurrent() throws InterruptedException {//多线程long beign = System.nanoTime();//获取当前时间戳毫秒数Thread t1 = new Thread(()->{long a = 0;for (int i = 0; i < count; i++) {a++;}});t1.start();long b = 0;for (int i = 0; i < count; i++) {b++;}t1.join();long end = System.nanoTime();//获取结束时间戳System.out.println("并行:"+(end-beign));}public static void serial(){long begin = System.nanoTime();long a = 0;for (int i = 0; i < count; i++) {a++;}long b = 0;for (int i = 0; i < count; i++) {b++;}long end = System.nanoTime();System.out.println("串行:"+(end-begin));}
}
-
我们并不知道何时并发的两个线程是并行还是并发,这都是取决于线程的调度器的调取问题!
-
并发编程也不一定比串行快,如果自增的两数较小,创建变量的时间占据该线程执行的大部分时间,那么就达不到并发编程的优势!
-
是否采用多线程编程视情况而定,并非无脑多线程!
一个
java进程中自动会创建一个main线程!!!并在操作系统有对应该线程!
我们如何查看线程是否在操作系统中创建成功呢?
我们再jdk中的lib文件夹下打开jconsole.jar文件便可以查看线程!!!

我们打开便可以看到我们创建的java线程以及jvm自带的一些线程!!!
创建Thread实例
- 方法一
创建Thread子类,重写run方法
class Mythread extends Thread{@Overridepublic void run() {//描述线程要执行的任务!System.out.println("run");}
}
public class Thread_1 {public static void main(String[] args) {Thread t1 = new Mythread();t1.start();}
}
这里的run只是描述该线程需要执行那些任务!这只是创建了一个类! 线程的执行需要该线程实例执行start方法!执行start方法后操作系统才会创建对应的线程!

- 方法二
创建一个类实现Runnable接口,重写run方法,再将该类传参到创建Thread对象的构造方法!
class MyRun implements Runnable{@Overridepublic void run() {//描述任务System.out.println("实现Runnable接口创建线程!");}
}
public class Thread_2 {public static void main(String[] args) {//将实现Runnable接口的对象传入Thread构造方法中!Thread t1 = new Thread(new MyRun());t1.start();//创建线程}
}我们来看看Thread类的4个构造方法!

Thread() 无参构造
通过继承Thread类
Thread(Runnable target);
传入Runnable对象
Thread(String name);
给线程命名,便于程序员调试

- 方法三
Thread匿名内部类
public class Thread_3 {public static void main(String[] args) {Thread t1 = new Thread(){@Overridepublic void run() {System.out.println("Thread匿名内部类!");}};t1.start();}
}

- 方法四
Runnable接口匿名内部类
public class Thread_5 {public static void main(String[] args) {Thread t1 = new Thread(new Runnable() {@Overridepublic void run() {System.out.println("Runnable匿名内部类!");}});t1.start();}
}

- 方法五
lambda表达式
方法四/五的升级版!
public class Thread_6 {public static void main(String[] args) {Thread t1 = new Thread(()->{System.out.println("lambda表达式!");});t1.start();}
}

我们比较推荐使用Runnable接口创建线程实例!
因为实现Runnable接口,可以让线程和线程执行的任务,更好进行解耦!!!
简单说就是Runnable方法创建线程实例, Runnable可以将线程和线程任务分开!
我们实现一个Runnable接口,我们只需要把入线程任务描述出来,不必关系那个线程执行该线程任务!,可能是线程,可能是进程,可能是协程,这些我们都不用关系!!!
Thread下的一些重要方法
start();
决定操作系统中是否真正创建了该线程!
如果没有执行该语句,那线程就不会执行!!!
run();
run只是一个方法,单纯描述了该线程,就是线程内容,并不是真正的run便没有创建好该线程!!!
中断线程
中断线程就是让线程停下来!
我们有两种方法中断线程,对应的关键就是让run方法执行完毕!!!
还有一个特殊的main线程,对于main线程就需要main方法执行完毕,线程才会结束!!!
- 手动设置标志位
自己创建一个boolean变量, 来控制线程是否要执行结束!
public class Thread_6 {public static void main(String[] args) {boolean isQuit =true; //其他线程控制该标志位!Thread t1 = new Thread(()->{while (true&&isQuit){System.out.println("Hello Thread!");try {Thread.sleep(1000);} catch (InterruptedException e) {e.printStackTrace();}}});t1.start();}
}
我们其他的线程可以控制该标志位isQuit就可以中断该进程!!!
- 使用
Thread内置标志位,进行判定
Thread.interrupted();静态方法

Thread.currentThread();静态方法 返回当前线程实例!

interrupt();实例方法中断线程!

public class Thread_7 {public static void main(String[] args) {Thread t1 = new Thread(()->{//while (Thread.currentThread().isInterrupted()){System.out.println("hello thread!");try {Thread.sleep(1000);} catch (InterruptedException e) {e.printStackTrace();}}});t1.start();t1.interrupt();}
}
当我们执行上面代码后:

代码打印了异常信息!
因为上方代码线程大部分时间是处于休眠状态阻塞!
而我们的interrupt();方法执行后,有两种情况!
1.该进程处于就绪状态,设置标志位为true
2.该进程处于休眠状态,抛出InterruptedException异常!
所以可以看到当执行完一次run便抛出异常,程序中断!我们在中断之前也把异常信息打印了!
线程等待
join();
每个线程的调度顺序是无法确定的!如果我们要顺序执行某些线程就需要用到线程中的join方法
public class Thread_9 {public static void main(String[] args) throws InterruptedException {Thread t1 = new Thread(()->{while (true){//死循环 }});t1.start();t1.join(); // 让main线程等待t1线程执行完再执行!System.out.println("执行main线程");}
}

显然这个代码,我们无法等待t1线程执行结束!因为该线程是个死循环无法结束!
而这样的线程等待也毫无意义!毕竟一直死等下去,程序中断在此!
join(毫秒数);
我们的线程等待可以设置毫秒数,如果到了时间,那么其他线程也不会等待该线程,不管该线程是否结束!
//main线程等待t1线程10m后再执行
public class Thread_9 {public static void main(String[] args) throws InterruptedException {Thread t1 = new Thread(()->{while (true){//死循环}});t1.start();t1.join(10_000); // 让main线程等待t1线程10m再执行!//如果t1线程没有执行结束10m后过时不候!System.out.println("执行main线程");}
}

Thread.currentThread();静态方法 返回当前线程实例!
我们通过该方法可以获取到当前线程的实例,可以知道某一时刻调用了那个线程!
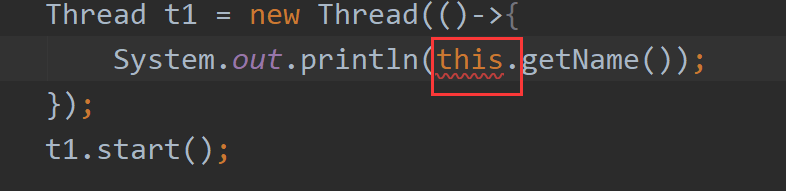
public class Thread_10 {public static void main(String[] args) {Thread t1 = new Thread(){@Overridepublic void run() {//通过this获取当前实例!System.out.println(this.getName());//获取当前线程名}};t1.start();}
}

我们不能通过Runnable接口来获取当前线程实例,实现该接口的类只是描述了一个线程任务,并无法知道那个线程执行该任务!
sleep();
线程休眠,我们知道如果某线程调用了该方法那么该线程就处于阻塞状态!
我们之前说过,线程在操作系统中,用pcb结构体结构来描述属性,然后用双向链表连接!
如果某一线程调用了sleep方法,那么该线程就会在该双向链表中暂时取下,阻塞状态就无法上cpu~
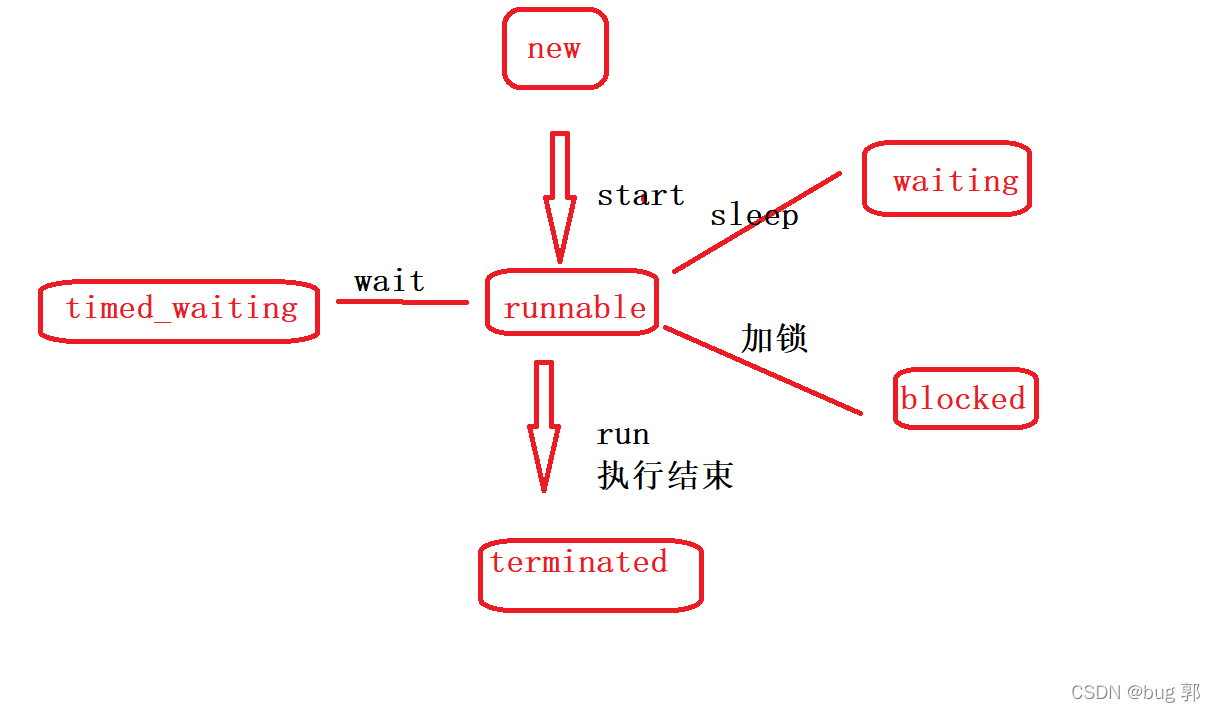
java线程状态描述
我们的java对线程的状态又进行了进一步划分!这些状态在操作系统并没有!java对线程状态进一步划分便于程序员调试bug当一个线程中断了,这些java特有的状态描述,便于我们知道该程序是在什么时期卡死的!
new安排了工作,还未开始行动!
说明此时java只把线程任务写好,创建好了线程对象,并没有执行start方法,操作系统并没有创建对应的线程!
runnable可工作的,又分为正在工作和即将工作
也就是我们已经执行了start方法,在系统中创建好了对应的线程!一般当线程调用后,如果我们没有进行sleep,或其他阻塞线程操作,那线程多半处于runnable状态,在pcb链表中就绪,随时可以上cpu,或者已经在cpu执行!
terminated工作完成了
操作系统中对应的线程已经执行结束,然而java中的线程对象还在,获取到的状态!
我们可以通过Thread类中的getState()的实例方法,获取当前线程的状态!

//演示上述的3种状态!
public class Thread_11 {public static void main(String[] args) throws InterruptedException {Thread t1 = new Thread(){@Overridepublic void run() {for (int i = 0; i <10; i++) {//t1线程一直处于runnable状态!System.out.println("hello thread!");}}};//getState();方法可以获取到线程当前状态!//创建好了线程对象,并没有在操作系统中创建对应的线程System.out.println("start前:"+t1.getState());t1.start();//在操作系统中创建好了对应的线程!//runnable状态!System.out.println("start后:"+t1.getState());//等待t1线程执行结束!t1.join();//获取到terminated 结束状态!System.out.println("t1结束:"+t1.getState());}
}
表示排队等待其他事情
下面的3个线程状态都是阻塞状态,但是互相又有些区别!
blocked
当前线程在等待锁,导致的阻塞,后面我们会介绍synchronize而导致的阻塞
public class Thread_13 {private static int i=0;public synchronized static void increase(){for (int j = 0; j <100_0000 ; j++) {i++;}}public static void main(String[] args) {Thread t1 = new Thread(){@Overridepublic void run() {increase();}};Thread t2 = new Thread(){@Overridepublic void run() {increase();}};t1.start();t2.start();//线程t1和t2都要执行increase方法!当t1执行时,那么t2就要等待锁!System.out.println("t1:"+t1.getState());System.out.println("t2:"+t2.getState());}
}
waiting
当前线程在等待唤醒,导致的阻塞!
private static int count;public static void main(String[] args) {//waiting : 等待唤醒导致的阻塞态!//锁对象Object locker = new Object();Thread t1 = new Thread(()->{synchronized(locker){for (int i = 0; i < 100_0000; i++) {count++;}System.out.println("count:"+count);try {Thread.currentThread().sleep(1000);} catch (InterruptedException e) {e.printStackTrace();}locker.notify();//唤醒!}});Thread t2 = new Thread(()->{synchronized (locker){try {locker.wait();//等待唤醒!} catch (InterruptedException e) {e.printStackTrace();}for (int i = 0; i <100_0000 ; i++) {count++;}System.out.println("count:"+count);}});t1.start();t2.start();System.out.println("t1:"+t1.getState()+" t2:"+t2.getState());}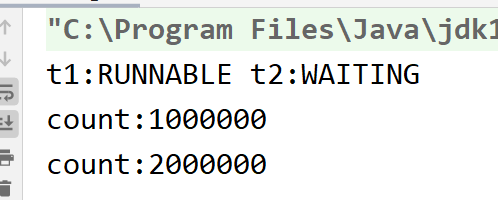
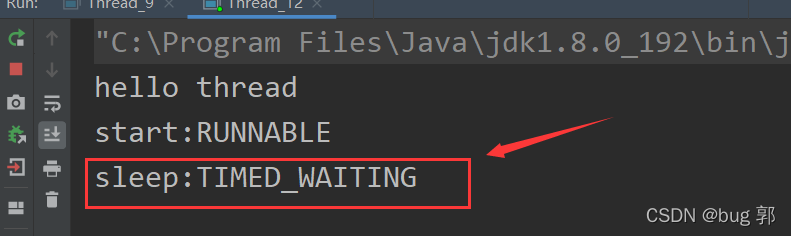
timed_waiting
代码调用了sleep就会进入timed_waiting阻塞状态,或者join超时
public class Thread_12 {public static void main(String[] args) {Thread t1 = new Thread(){@Overridepublic void run() {while (true){//这个线程大部分时间处于阻塞状态!System.out.println("hello thread");try {Thread.sleep(5000);} catch (InterruptedException e) {e.printStackTrace();}}}};t1.start();System.out.println("start:"+t1.getState());System.out.println("sleep:"+t1.getState());}
}
我们再画一个图便于大家理解上述的各种状态!